This guide helps with installing WireGuard VPN on Defender connecting with a PC client or another Defender. WireGuard provides simplified point to point and point to multi-point VPN.
APPLICABLE PRODUCTS
Anybus Defender 4000 Series and up, with DPI or PRO licenses.
VERSIONS USED IN THIS ARTICLE
- Anybus Defender 2.5.2-2025111723
Setup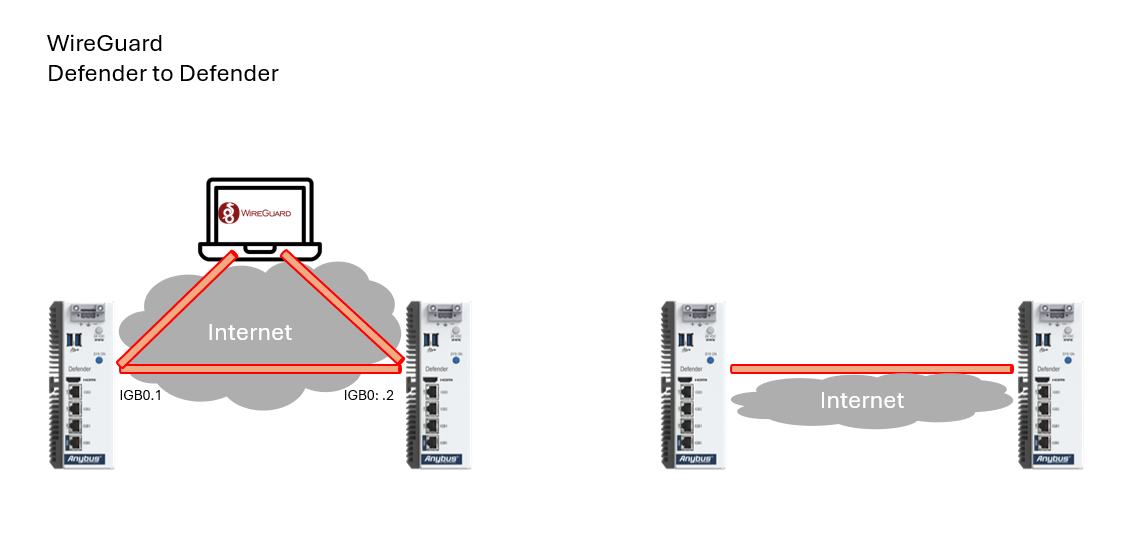
PRE-REQUISITES
Step guide:
It is strongly advised to make a similar diagram for your network setup before you start. Make sure each defender is up to date with the latest Defender firmware version and has the WireGuard package installed.
- Install and Enable WireGuard
- Setup WireGuard “Tunnels”
- Add WireGuard “Peers”
- Configure WireGuard Interfaces
- Configure Static Routing
- Configure Firewall Rules
- Verify Connectivity
All steps need to be performed on each Defender.
Step 1 – Enable WireGuard and Create the Client-Site and Server-Site “Tunnels”
Note: Do this on Both Defenders.
- Check in System -> Package Manager -> Installed Packages that WireGuard is installed.
If not install it via “Available Packages”. Note that your WAN interface must be connected to the internet to download packages.
2. Go to “VPN” -> “WireGuard”.
3. Go to “Settings”, enable WireGuard select “Only Unassigned Tunnels” for Interface Group Membership.
4. “Save” to enable the WireGuard service on each defender.
Step 2 - Setup WireGuard “Tunnels”
Note: Do this on Both Defenders.
- Go to “VPN” -> “WireGuard” -> Tunnels.
- Enable the Tunnel
- Give it a description – in this example “Wireguard_Server”
- Set port or leave it as default (51820)
- And then Click “Generate” to generate the public and private key.
- Copy the Public Key and note them down (Remember to label them correctly)
- Click “Save Tunnel”
- Apply Changes
Step 3 – Add WireGuard “Peers”.
Note: we start with the Server Site first:
- Edit the Tunnel just created on Server Site and at the bottom click “Add Peer”.
- Name the Peer – in this example “Anybus_LAB”
- Unselect “Dynamic Peer”
- Enter the WAN IP address of “Client Site” – in this example “192.168.1.9”
- Paste the previously Saved Public key from “Client Site” in “Public Key”
- Add the IP for the Tunnel Network Interface of the Client (in this example 20.200.0.8/32) and the LAN Network of the “Client Site” (in this example 10.200.0.0/16)
- “Save Peer”
- “Apply Changes”
Note: Next the Client Site.
- Edit the Tunnel on Client Site and at the bottom click “Add Peer”.
- Name the Peer – in this example “Defender_LAB”
- Select “Dynamic Peer”
- Paste the previously Saved Public key from “Server Site” in Public Key
- Add the IP for the Tunnel Network Interface of the Server (in this example 20.200.0.9/32) and the LAN Network of the “Server Site” (in this example 192.168.200.0/24)
- “Save Peer”
- “Apply Changes”
Step 3: Configure WireGuard Interfaces.
Server-side Defender first:
- Navigate to the Interfaces –> Assignments.
- Add the available port tun_wg0
- “Save”
- Click on Port name to edit (OPT2 in this example)
- Check Enable interface
- Provide a Description (in this example “Wireguard_Server”)
- Set IPv4 Configuration Type: Static IPv4
- IPv4 address: 20.200.0.8 and subnet mask /24
- Press “+ Add a new gateway”
- Gateway Name: Wireguard
- IP address: server-side IP address used on its WireGuard interface – in this example: 20.200.0.9
E.g. this is the “Next Hop” for traffic when routed over the WireGuard interface.
- + Add
- Save
Client Site Defender next:
- Navigate to the Interfaces –> Assignments.
- Add the available port tun_wg0
- “Save”
- Click on Port name to edit
- Check Enable interface
- Provide a Description (in this example “Wireguard_Server”)
- Set IPv4 Configuration Type: Static IPv4
- IPv4 address: 20.200.0.9 and subnet mask /24
- Press “+ Add a new gateway”
- Gateway Name: Wireguard
- IP address: Client Site IP address used on its WireGuard interface – in this example: 20.200.0.8.
E.g. this is the “Next Hop” for traffic when routed over the WireGuard interface.
- + Add
- Save
Step 4: Configure Static Routing.
- On Server Site go to “System -> Routing -> Static Routes” and click “Add”.
- Add the Client Site LAN Network as the “Destination Network” – in this example 10.200.0.0 and subnet /16
- Select the Gateway earlier create “Wireguard” with IP 20.200.0.8, the Next Hop address.
- Save
- Apply changes
2. On Client Site go to “System -> Routing -> Static Routes” and click “Add”
- Add the Server Site LAN Network as the “Destination Network” – in this example 192.168.200.0 and subnet /24
- Select the Gateway earlier create “Wireguard” with IP 20.200.0.9, the Next Hop address.
- Save
- Apply changes
Step 5: Configure Firewall Rules.
Note: Do this on Both Defenders.
- Go to Firewall à Rules à WIREGUARD_SERVER
- Click Add to add a rule
- To allow all traffic including ping – set Protocol to Any and Save
- Apply Changes
Step 6: Verify Connectivity & Troubleshooting.
It can be desirable to add the WireGuard status to the Desktop.
- On the Dashboard on each Defender, press the + in the grey path-bar.
- From the new appeared menu, select +WireGuard
The WireGuard overall status, number of active Peers and number of MB received and transmitted is visible on a new tile on the dashboard. Click on the tunnel name to shortcut to WireGuard configuration.
- In menu Staus -> WireGuard (or menu VPN -> WireGuard -> Status) the overall status on of the tunnels is shown.
- Click on “Show Peers” to view details about the connection setup.
- Test your tunnel by pinging from a device on one LAN to a device on the Other LAN. Make sure each device has its Default GW set to the Defender’s LAN address.
- You can also ping from the Defenders to test the tunnel. On Server Site Defender go to Diagnostics -> Ping.
-
Red means that a handshake never happened, yellow means that a handshake is older than 5 minutes, and green means that there is a connection.
- You can from the Server Site, select its LAN interface and try to ping the Client site LAN interface:
- Similarly, from the Client Site, select its LAN interface and try to pint the Server site LAN interface:
- If unsuccessful you can ping step by step the interface and verify the configurations accordingly.
Adding a PC client
1. Download the WireGuard Installer from WireGuard.com/install/ and install it (You will have to be the inbuilt admin on the PC to install the client).
2. After starting WireGuard press the “Add Tunnel” or “+”-> “Add Empty Tunnel”.
3. Select the empty tunnel and click edit in the bottom right corner, a new window will pop up that will have the “Public Key” and “Private Key”. Keep the Private Key safe and don´t share it, the Public Key is the one that will be used.
4. In the Tunnel Interface you will have to write the following yourself:
[Interface]
Address = 20.200.0.20/32 (This is the IP that the PC will have in WireGuard)
[Peer]
PublicKey = /SQSSo3eGnWvAooQiMdZ9E5xXH6BOTLHlnT/iBap+z4= (Share with the server)
AllowedIPs = 20.200.0.0/24, 192.168.200.0/24 (What subnets that you can access through this PC)
Endpoint = 10.10.10.1:51820 (How to access this Peer)
PersistentKeepalive = 25 (How many seconds between each Keep Alive packet)
5. You will have to add this Peer to the server as well, under VPN -> WireGuard -> Peers, click “+ Add Peer”
- Assign the Tunnel to tun_wg0
- Keep Endpoint as “Dynamic”
- Keep Alive as 25 seconds
- Copy and Paste in the Public key from above
- Allowed IPs as 20.200.0.21/32
© HMS Networks AB 2022