Abstract
This document describes using Crimson software to change IP Address for an existing program that's running in the Red Lion unit.
Products
Red Lion Controls CR1000 Human Machine Interface (HMI), CR3000 HMI, Data Acquisition (DA10, DA30), Data Station Plus, FlexEdge™ (DA50A, DA70A), G3 HMI, G3 Kadet HMI, Graphite® Controller, Graphite HMI, Modular Controller, and Productivity Station™
Use Case
Change IP Address in a redlion unit via USB, or Ethernet.
Required Software:
Crimson 3.0, Crimson 3.1 & Crimson 3.2
Crimson Communication Configuration:
You need to have the copy of the Crimson database that's running in the unit. File extension would be .cd3 for a Crimson 3.0 database, .cd31 for a Crimson 3.1 database and .cd32 for a Crimson 3.2 database
If you don't have a copy of the Crimson database, you can attempt to extract the database from the unit by doing a link -> extract.
Please see this tech note for more information on how to extract:
https://support.hms-networks.com/hc/en-us/articles/27220929641746-Crimson-Database-Extraction
Once you have the Crimson database, follow the instructions below:
Crimson 3.0 and Crimson 3.1:
To change IP Address via Ethernet:
- Make sure you can ping the existing IP Address in the unit.
- Open Crimson and click on Communications->Network->Download tab
- Set the IP Download to "Enabled"
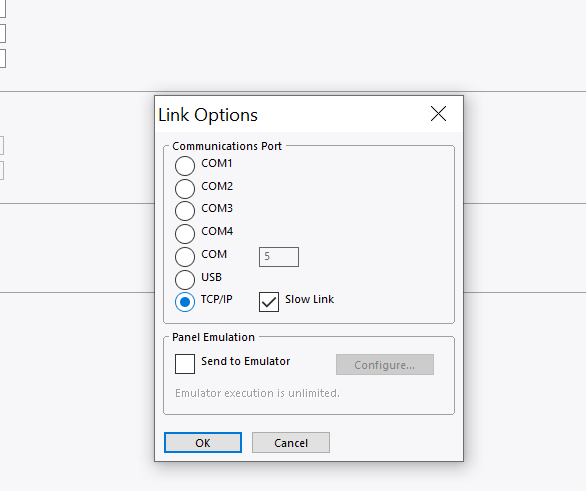
- Unit Addressing -> Set the selection Mode: to Manual
- Set the Remote IP to the old IP(existing) address of the device. In this example below, 192.168.1.20 is the existing IP Address in the unit

- Go under Network -> Ethernet 1 tab and enter new IP Address that you want to assign to the unit. In this example below, 192.168.1.80 is the new IP Address that is going to be assigned to the unit.

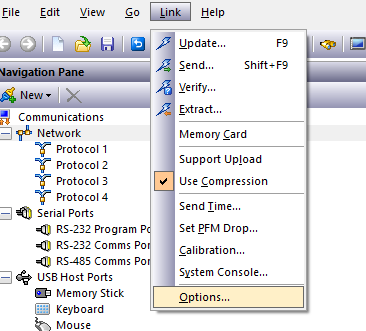
- Go to link -> Options-> TCP/IP

- You have now successfully used old IP Address( existing one) to assign a new IP Address to the unit.
- You should now be able to ping the new IP Address.
- Once you confirm, go under download tab and set the selection mode back to Auto Ethernet 1.
To change IP Address via USB port.
- Go to link -> Options -> USB
- Go under Network -> Ethernet 1 tab and enter new IP Address that you want to assign to the unit. In this example below, 192.168.1.80 is the new IP Address that is going to be assigned to the unit.

Crimson 3.2:
To change IP Address via Ethernet:
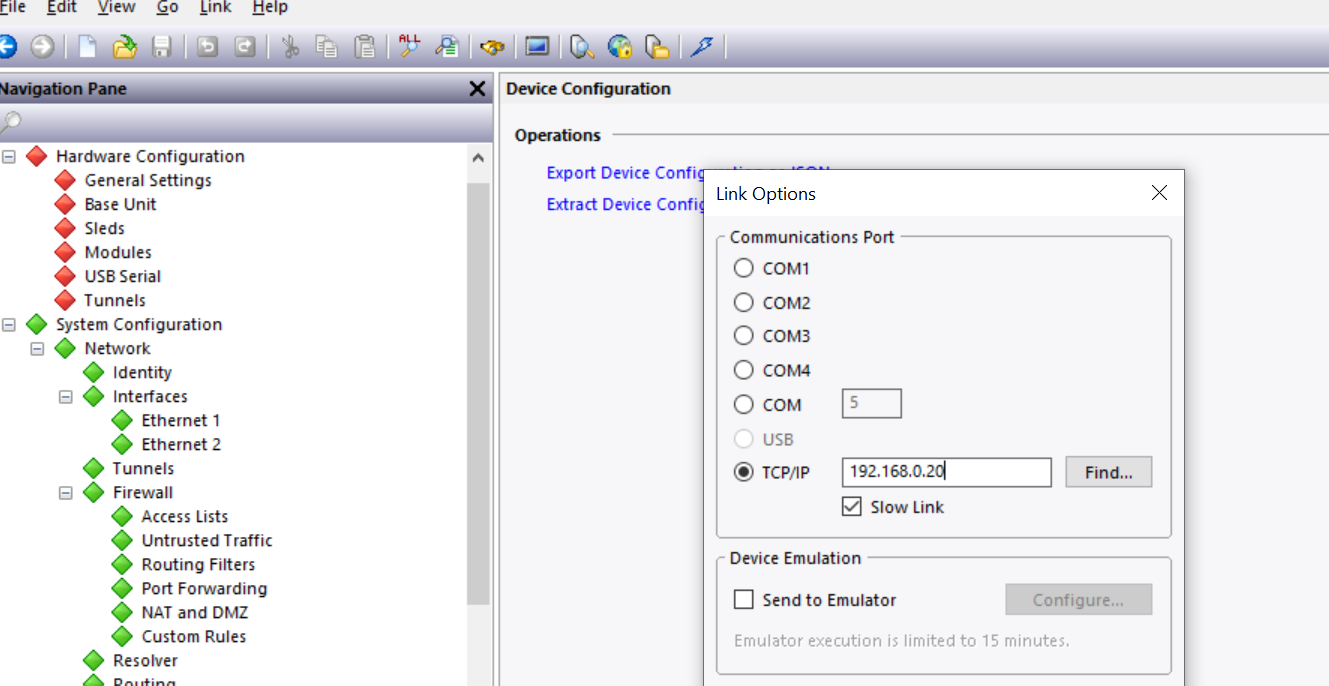
- Open Crimson 3.2 database (.cd32), go to link -> options -> TCP/IP and type in the existing IP Address that's currently in the unit. In this example below, 192.168.0.20 is the existing IP Address in the unit for Ethernet 1
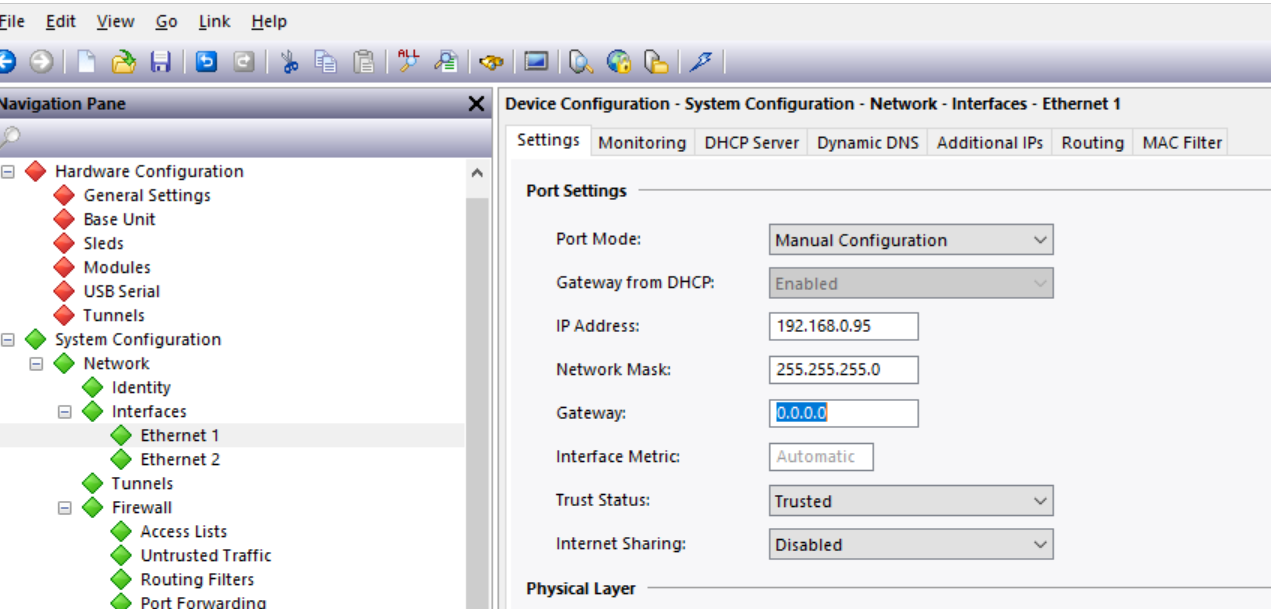
- Go under hardware configuration -> system configuration -> Interfaces -> Ethernet 1 and enter the new IP Address that you want to assign to the unit. In this example below, 192.168.0.95 is the new IP Address that is going to be assigned to the unit.
- Go to link -> update to download the database to the unit following which the unit will have the IP Address 192.168.0.95

- Ping the new IP Address to confirm network connectivity.
- Go to link -> options -> TCP/IP and enter the IP Address of 192.168.0.95 for future downloads.
To change IP Address via USB port.
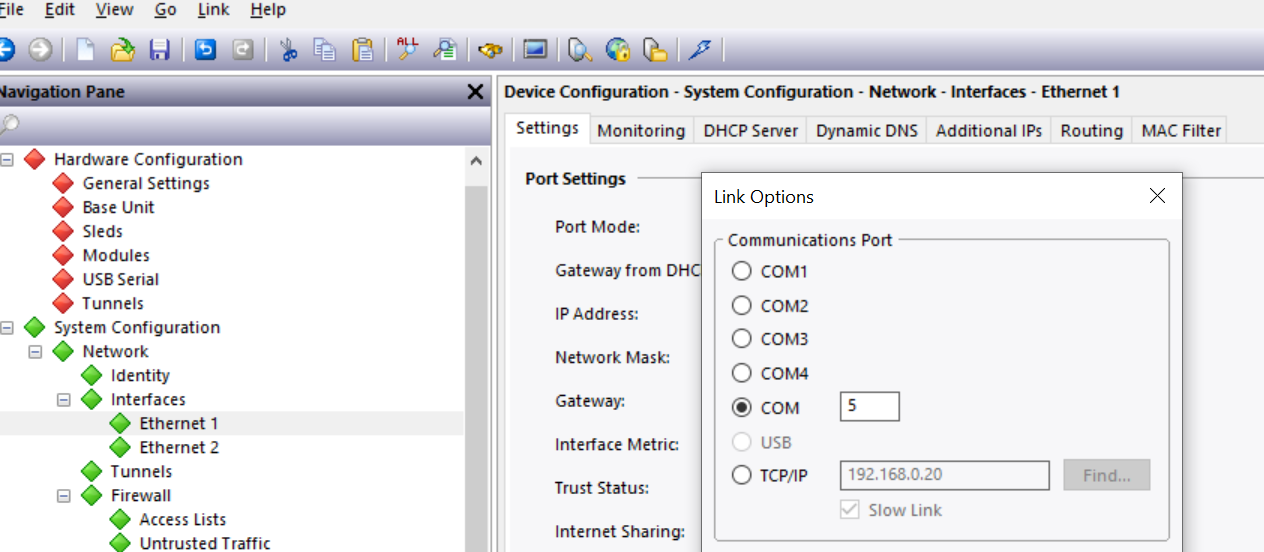
- Go to link -> Options -> select the appropriate com port number. You will need to open device manager on your PC to find which com port number is being linked to this USB connection.
- Go under hardware configuration -> system configuration -> Interfaces -> Ethernet 1 and enter the new IP Address that you want to assign to the unit. In this example below, 192.168.0.95 is the new IP Address that is going to be assigned to the unit.
- Go to link -> Update
Disclaimer
It is the customer's responsibility to review the advice provided herein and its applicability to the system. Red Lion makes no representation about specific knowledge of the customer's system or the specific performance of the system. Red Lion is not responsible for any damage to equipment or connected systems. The use of this document is at your own risk. Red Lion standard product warranty applies.
HMS Technical Support
If you have any questions or trouble contact HMS Technical Support by clicking here.